0

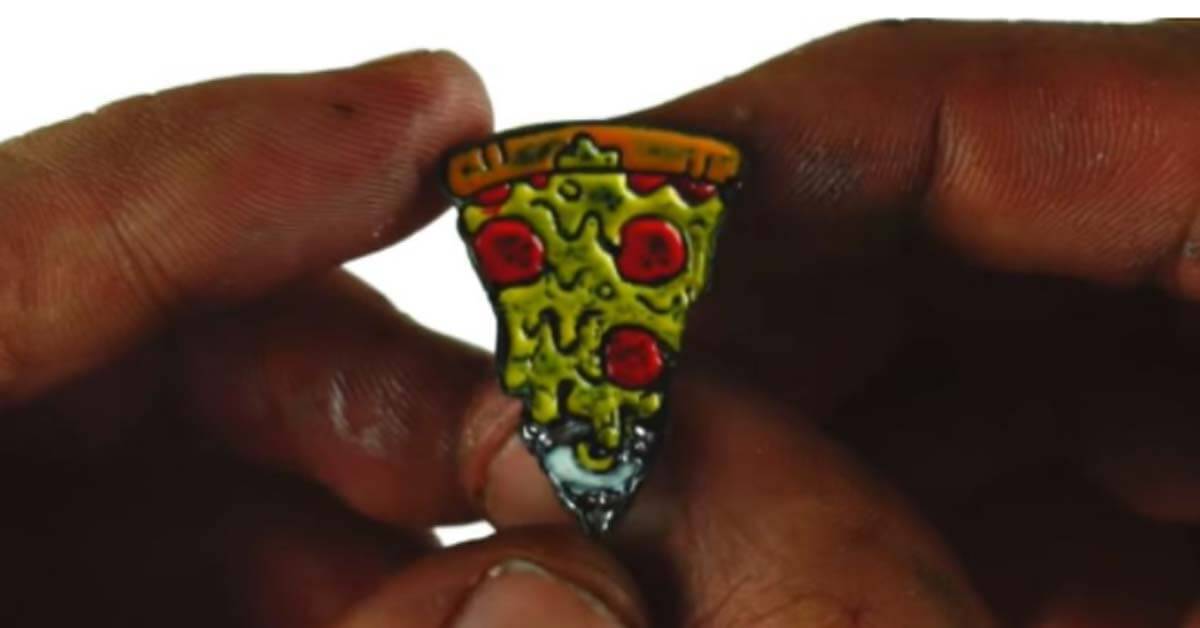
- Shrink film is the easiest way to make a lapel pin at home: draw, color, cut, bake, seal, then glue on a pin back.
- For a glossier, more finished look, print your design on shrink film and seal it under UV-cured resin. It's still plastic, not a metal enamel pin.
- Hard enamel and gold or silver plating need high heat, polishing and plating equipment that a home setup doesn't have.
- Home methods work well for one pin or a prototype. For 50 or more identical pins, a manufactured order is usually faster and more consistent.
The easiest way to make lapel pins at home is with shrink film. Draw your design on the sheet, color it, cut it out, bake it until it shrinks, seal it with a gloss coat and glue a pin back on. If you want something glossier, print the design on shrink film instead and seal it under UV resin.
We make pins for a living, so you'd expect us to talk you out of this. The first version of this post more or less did: watch a YouTube clip, see how much work it is, then call a professional. That was lazy advice. A homemade pin is a good way to test a design, make a one-off gift, or find out whether your idea still reads at one inch wide before anyone cuts a mold. Where home methods struggle is the second pin. And the fiftieth.
Below are the four methods we found actually documented in the tutorials that rank for this question, what each one needs, and where each one runs out of road.
Four ways to make lapel pins at home
- Shrink film. What you end up with: a flat, glossy, hand-drawn pin. What you need: shrink film, black permanent marker, acrylic paint or markers, fine-grit sandpaper, an oven, gloss sealer, pin backs and strong craft glue. Where it falls short: it's plastic. No metal edges, no plating.
- Printed shrink film + UV resin. What you end up with: a full-color pin with a glossy, domed finish. What you need: printable shrink film, an inkjet printer, an oven or heat gun, UV resin, a UV lamp, a gold or silver paint pen, strong glue and pin backs. Where it falls short: it's still plastic, and the print can bleed a little on the film's texture.
- 3D-printed base. What you end up with: raised lines in one filament color, with painted fill. What you need: a 3D printer, an STL file, acrylic paint, two-part epoxy glue and pin backs. Where it falls short: one pin at a time, and you need access to a printer.
- Painted or etched metal blank. What you end up with: real metal, hand-painted. What you need: an etched metal blank, enamel craft paint, sandpaper, polishing compound, clear sealant and a pin back. Where it falls short: it takes the most practice. The tutorial author says to expect trial and error.
If you've never made a pin before, start with shrink film. It's cheap, it forgives mistakes, and you'll know in an afternoon whether you enjoy this.
How to make lapel pins at home with shrink film
This follows the faux enamel pin method a teen services librarian wrote up for her library's MakerSpace, plus a few common craft habits that make the paint behave.
- Draw your design much bigger than the finished pin.
- Lightly sand the shrink film with fine-grit sandpaper.
- Trace the outlines in black permanent marker.
- Fill the colors with thinned acrylic paint.
- Cut along the black outline.
- Bake following your film's package directions until the piece shrinks and goes flat.
- Seal it with a glossy decoupage medium such as Mod Podge.
- Glue a pin back to the back with a strong craft glue like E6000.
Step 1: Draw big
Shrink film shrinks a lot. Shrinky Dinks come out at about one-third of their original width and height and roughly nine times thicker, so a drawing three inches wide comes out close to one inch. Colors also darken a bit as the plastic shrinks, so start lighter than you want the finished pin.
Draw on paper first at the finished size and squint at it. If a detail disappears at one inch on paper, it'll disappear on the pin too.
Steps 2 to 4: Sand, outline, color
Sanding gives the paint something to grip. Skip it and acrylic tends to bead on the slick surface.
Thin your acrylic with a little water before you paint so it goes on smooth, and paint every color before the film goes in the oven. A fine brush handles most areas, and a toothpick gets into the small ones. Colored pencils and markers also work and are easier for kids.
Step 5: Cut on the line
Cut right along the black outline. Leave a sliver of unpainted film outside it and you'll get a white rim around the finished pin that looks a lot worse after shrinking than it did before.
Step 6: Bake
Different brands of film want different settings, so use the time and temperature on your package. If you do crafts like this often, the MakerSpace write-up recommends keeping a toaster oven just for them.
The piece will curl up in the oven and look ruined. Wait. It suddenly goes flat as it finishes shrinking. Give it a second or two after that, then take it out to cool.
Steps 7 and 8: Seal and attach
Let it cool, then brush on a coat of glossy Mod Podge to seal the paint. Once that's completely dry, glue a pin back to the back. A tie-pin style back, sold in the jewelry findings aisle of most craft stores, is closest to what a manufactured enamel pin uses.
Give the glue its full cure time before you wear it. The Doodlecraft tutorial below gives it at least four hours and prefers overnight. A pin that pops off on a jacket sleeve is usually a pin you don't see again.
How to make a glossy pin with printed shrink film and UV resin
If hand-painted shrink film looks too much like a craft project, this is the next step up. The Doodlecraft tutorial prints the artwork straight onto printable shrink film, on the rougher side, with each image about two to three inches across. Cut the shapes out and shrink them in the oven or with a heat gun, then press a small glass on top while the plastic is still warm so it cools flat. Spread UV resin over the front with a craft stick, working it to the edges, and cure it under a UV lamp. The author's pins set in about a minute and a half. Run a gold or silver paint pen around the edge for a metal-looking border, and glue on the pin back.
What you get is a home version of an offset printed pin: a full-color image under a clear dome. It's still plastic, though, and the print can bleed slightly into the film's texture. There are no raised metal lines. Those need a mold or a 3D printer, which brings us to the next method.
Using a 3D printer
We wrote a full walkthrough of this in DIY enamel pins and 3D printing, so here's the short version. Print your design in one filament color (that color becomes the "metal" lines), then fill each section with acrylic paint mixed into two-part epoxy glue, applied with a toothpick. The glue sets in minutes, so mix one color at a time. It also darkens as it hardens, so mix your colors a shade brighter than you want them.
Painted and etched metal blanks
This is the method that gets closest to a real metal pin, and it's the one that eats weekends.
The Instructables tutorial on making enamel pins from home runs to 18 steps. It starts from an etched metal pin, then builds up thin coats of enamel craft paint about 45 minutes apart until the paint sits above the un-etched lip of the metal. Then comes sanding and polishing back down. The materials are cheap. The author's warning is that it takes trial and error to get consistent results, so don't be discouraged when the first couple of attempts don't work out.
Our original post pointed readers to a four-minute YouTube clip of the process. Those four minutes stood for several days of trial and error. That's the honest price of this method: not the materials, the attempts.
Can you make hard enamel pins at home?
Not really. Hard enamel is filled level with the metal lines, baked at high temperature, then ground and polished flat. A home kitchen doesn't have the kiln or the polishing equipment for that. Plating is the other wall. Gold, silver, black nickel and antique finishes are applied by soaking the pin in a plating solution, and nobody has that bath in their garage.
So what you can make at home is an imitation of soft enamel, in plastic, resin or painted metal. If you've got your heart set on the smooth, polished look, read soft enamel vs. hard enamel before you order, because the two feel very different in the hand.
Where a home method stops making sense
Picture the Saturday. You've made one shrink film pin you're proud of. Now your kid's whole swim team wants one. Every one of those is drawn, colored, cut, baked, sealed and glued by hand, and no two will match exactly.
That's the line. Home methods are for one pin, a handful of gifts, or a prototype. A manufactured pin makes more sense when:
- You need identical pins. A die stamps the same design every time. By hand, pin 30 won't match pin 1.
- You want real metal and plating. Gold, silver, black nickel or antique finishes.
- The design has photos, gradients or tiny text. You can't paint that cleanly with a toothpick. We'd make it an offset printed pin, printed directly on the metal and sealed under an epoxy dome.
- The pins have to survive. Trading pins, backpacks and uniforms take knocks that craft glue and sealer weren't built for.
Then there's cost. Film, resin and glue are cheap, but a UV lamp, a printer or a spare toaster oven isn't, and none of it counts your time. For comparison, our price list has 100 soft enamel pins at one inch for $292, or $2.92 each, plus tax. That includes the mold, setup, a backing card, free design and free shipping in the US. At 200 pieces it drops to $456, or $2.28 each. Our minimum is 50 pieces for pins, and orders usually arrive 10 to 15 business days after you pay and approve the design. Printed pins have a 72-hour rush option.
None of that makes the home pin pointless. It makes it a prototype.
Turn your homemade pin into the real thing
Here's the move we'd actually recommend. Make one at home, wear it for a week, see what people notice and what gets lost at arm's length. Then photograph it and send the photo with a free quote request.
We prefer vector artwork (.AI, .EPS or .SVG), but a JPEG or PNG is fine. Our designers redraw it as production art, and you'll get a proof within 4 hours to check before anything is made. If you can, send Pantone codes along with the photo of your handmade sample. It tells us exactly which colors you meant.
Mistakes that sink homemade pins
Designing at poster size. A design can look great at five or six inches and turn to mush at one inch. Scale it to the real size and look at it. Anything you can't make out with your own eyes won't make it onto the pin. (We go into this in how to make custom enamel pins.)
Blending colors you'll later want in enamel. Fine for shrink film. But if the home pin is a prototype for a manufactured enamel pin, every color needs its own section with a metal line around it. Enamel can't fade from one color into the next. Gradients mean offset printing.
Rushing the dry time. Every tutorial we read says this in its own way. Paint that isn't dry smears under the next layer, and glue that isn't cured lets go of the pin back.
Wearing it on the wrong thing. A glued-on pin back is fine on a lapel for an evening. On a backpack that gets thrown in a car trunk, it's on borrowed time. For manufactured pins going on jackets or bags, we recommend upgrading to a locking pin back. There's more on the options in our guide to lapel pin backings.
FAQ
Can you make an enamel pin without a mold?
You can make an enamel-style pin without one, using shrink film, a pre-molded blank or a 3D-printed base. A true metal enamel pin is stamped from a die cut into metal from your artwork. The die costs the same whether you make one pin or 10,000, which is why custom pin makers set minimums.
Is it cheaper to make lapel pins at home?
For one or two pins, usually yes, especially if you already own the tools. For a group order the math flips fast. Our price for 100 soft enamel pins at one inch is $2.92 each, with design and US shipping included. Compare that with your materials, any equipment you'd need to buy, and your hours.
What temperature do you bake shrink film pins at?
It depends on the brand, so use the time and temperature on your package. Whatever the setting, the piece curls up first and then goes flat when it's done shrinking.
What's the minimum order for custom lapel pins?
Ours is 50 pieces for pins, patches and coins. Our online price list starts at 100 pieces, so for 50, ask for a quote.
Can I send you a design I made by hand?
Yes. Send a photo, a sketch or a file. If you only have an idea, our artists will design it for you at no charge.
Next steps
- Want to try a 3D printer instead? Read DIY enamel pins and 3D printing.
- Ready to order? How to make custom enamel pins walks through design, digitizing and ordering.
- Not sure which type suits your design? Compare soft and hard enamel, or check real prices on our pricing page.